

Introduction
Do you have a blender? If so, then you probably know how difficult it can be to maintain one. You might even be experiencing some of the common problems associated with blenders, like food stuck in the blades or an old gasket that’s ready to give out. If this is true for you, don’t worry!
If you use a blender regularly, you should check out these easy DIY techniques for extending the life of your equipment. They’ll not only help it live longer, but they’ll also help you spot problems before they happen. To make things easier, we’ve divided the 25 tips into three categories.

This article will show you how to keep your blender running smoothly and looking new again by following these 25 general guidelines on maintenance of blender. You’ll learn everything from what foods are okay in your blender to how often they should be cleaned! So read on and find out more about making sure your blender lasts as long as possible!
How To Clean Your Blender Properly
1. Make Certain the Blender Is Turned Off:
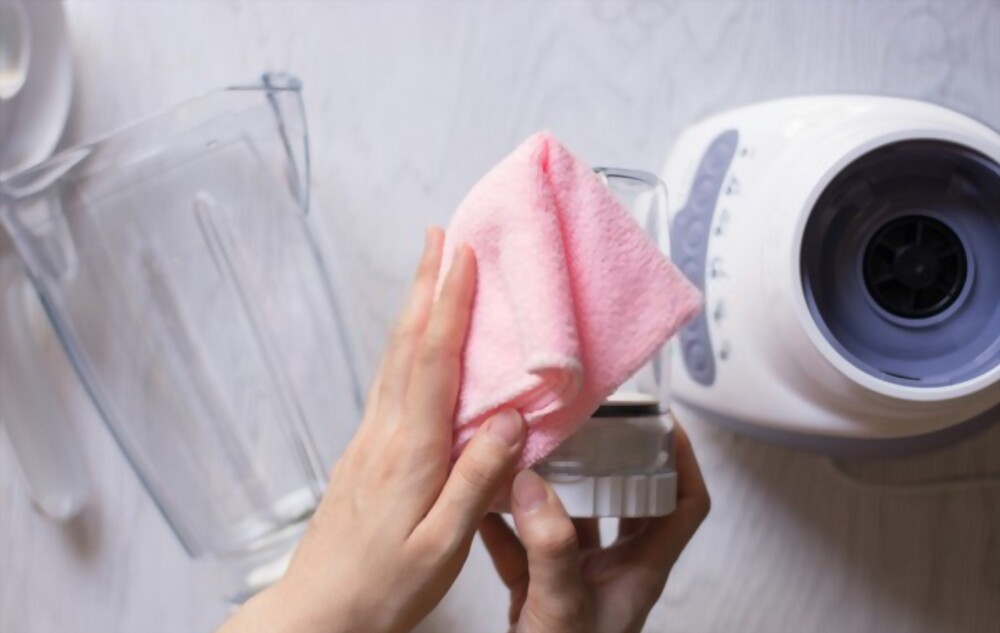
It’s vital to disconnect a blender before cleaning it because it’s powered by electricity. Water should never be allowed to enter the base, which houses all of the electrical components. To clean up spills, use a moist cloth, sponge, or wipe.
2. Rinse out the Blade Parts and Strainer
If you’re unsure how to clean your blender, it’s probably because you’re either over-scratching and gouging the surfaces or not scrubbing hard enough. You must rinse out the blade parts and strainer before placing them in a dishwasher or washing them by hand with a little soap. The bottom of the jar can also be gently scrubbed if needed, but use care when cleaning the lid to avoid scratching it up. If you’re washing yours by hand, be sure to use only a soft sponge and warm water. After it’s clean, place the blade parts in the strainer and shake to remove any excess water.
3. Using a Paper Towel or Cloth
If that doesn’t work, do not panic! You can try using a paper towel or cloth to eliminate some of the gunk stuck on the blades or lid before rinsing again. Many home remedies can help remove stains like lemon juice and baking soda. Just make sure your blender is unplugged first before trying any of these things out! To ensure that there’s no more food left behind after cleaning, run about 1/4 cup of salt with 1 cup of vinegar through the cycle without adding anything else. This will make sure any leftover food stuck between the blades and strainer is removed.
4. Don’t Overuse Soap
If you have a detachable blade part, you should remove it from the base before cleaning it. Make sure to keep track of the screw or bolt that holds it in place if needed. If they fit loosely, try using a little soap on them so they’ll tighten up more easily. Just don’t overuse too much soap since this can build up and prevent your blender from spinning properly anymore!
There are also many tools available online to help with proper cleaning like this one. You might want to check those out before buying an old-fashioned sponge and washcloth for your blender!
Related: Top 10 Best Blenders Under $200
5. Maintenance is Performed Once a Month.
If you use your blender regularly, you should clean it once a month. In this scenario, you should disassemble the machine. Make sure all gaskets, blades, and other parts are removed. Hand washes with liquid dish soap in warm water. Before reassembling the machine, make sure all parts (particularly the gaskets) are totally dry.
Blades that are rusting
If you discover your blender’s blades are rusty, it doesn’t necessarily imply you need to replace them. However, you must remove the rust. To do so:
- Remove the blades first. You’ll also need baking soda and water to produce a paste.
- Make sure the blade is clean before applying the paste with a toothbrush.
- Rub in the paste and remove the rust with steel wool.
- Rinse under running water and pat dry.
Keep in mind that this method only works on blades that have a minor bit of rust. If you can’t get all of the particles out with the blender, you should stop using it.
6. Keeping the Blades Clean
In most cases, the blades will clean themselves in the stages above, but excess food may become lodged under the blades, which can be difficult to reach. Fill your blender halfway with warm water and soap if this is the case. This time, however, you’ll want to add a tablespoon of vinegar and leave it alone overnight. Add more hot water and combine after it has set overnight. Any residue that remains should fall off, but you can use an oxygen cleaner if there is any persistent dirt (Oxiclean).
7. Keep in a Dry Place
If you don’t use your blender very often, you probably keep it somewhere else. Ensure that it is maintained in a dry, well-ventilated environment where it will not contact any moisture. Moisture can damage the electrical components of the machine, much like leaving it connected in. Not only that, but if the moisture is excessive, it can lead to rust and mildew.
8. Taking Care of the Blender Jar
You’ll want to clean your jar after each use and as soon as possible. The longer the food sits, the more difficult it will be to get it out of the blades. Over time, it might also cause them to corrode. Cleaning it, on the other hand, is a rather straightforward procedure. Begin by washing the container to remove any remaining debris. After that, half-fill it with lukewarm water and a drop of dish detergent.

At low speed, blend the water and soap for about a minute. Rinse the dish well. Add some lemon to your soap and water mixture if you have stubborn stains. You can also scrape the sides with half a lemon to remove stains.
You can try soaking the base of your blender in warm, soapy water to loosen any dirt or grime that might have been left behind. Then take a sponge and wipe any gunk away, followed by rinsing it with water and drying it off before reassembling everything. Just like the jar, you should also give the base a good soak in warm water before putting soap inside to wash away any particles on the bottom.
9. Keep It Off the Grid
Even if your blender is a permanent fixture on your kitchen counter, you should unplug it while not in use. It not only wastes energy but also wears out the electrical components of the appliance over time.
Maintenance Tips For Your Blender
10. Do Not Leave Your Blender Dirty
It is important not to leave your blender sitting dirty for too long as this can cause all sorts of problems like an old gasket that’s ready to break! Make sure you check if your old gasket is still in good condition every once in and while. If it appears worn out, you can purchase a new one for just a few dollars online or at your place of business! It’s also important to clean the blades each time you’re finished using them for better results later on.
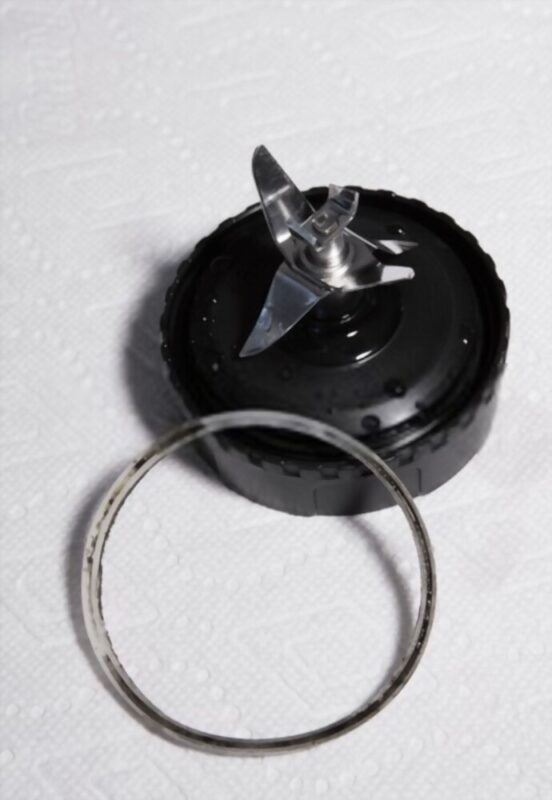
11. Replace the Old Gasket
Now that your blender is clean remember to keep it that way! If you have an old gasket that’s ready to give out, don’t delay replacing it, as this can lead to leaks and even fires! If you take some time during regular cleaning sessions to check on the blade parts, strainer and gaskets, you should notice any problems well before they end up causing serious damage! Instead of buying a new one altogether, try using several rough cloths or sponges to remove any leftover food or gunk. Be sure to wash them separately in warm water and soap afterward with your blender unplugged!
If your old gasket is ready for replacement or if one of your blade parts has become loose during cleaning, you can use some silicone sealant to fix this problem! You must be careful here because using too much sealant can cause leaks that will leave a mess everywhere! Make sure there is a very small amount on both ends of the part that needs to be fixed before letting it sit overnight, so the sealant has time to dry out on its own.
12. Use Properly
Before you start using a new blender, you should always read the owner’s handbook. While most of them are self-explanatory, it’s crucial to understand how long your machine can operate, how the jar should be attached to the base, and what indications to look for that suggest difficulty.
13. Hard Foods Should Be Avoided
Blenders are designed to combine liquids and softer foods. Harder items should be avoided unless your blender is specifically intended for them. Ice, ginger root, potatoes, and other tougher foods, for example, should be avoided. If you need to add something denser, chop it up into smaller pieces before blending. Blending too rough foods will wear out your motor and destroy the blades, much like overloading. Your blades may potentially seize or jam as a result of this. If you need to combine tougher items, we recommend using a food processor.
14. Examine for Damage:
You should inspect your blender for any damage before using it (even if you use it frequently). Check for tears and snags in the cable, as well as damaged, chipped, or cracked glass or plastic in your blender jar. Check the blades for a secure connection to the base and any other problems such as rust, a bent blade, and so on. When you use an appliance with a problem, it might cause many more difficulties than if you fix it before you use it.
15. If the blender is empty, do not run it.
It’s just as bad to use your blender when it’s empty as it is to use it when it’s full. The blades and motor will run excessively fast if there are no contents, making it wear out faster. Before turning on the machine, make sure there is anything in it (even while cleaning—which we’ll cover in the next part).
16. Don’t Overburden Yourself.
When using your blender, one of the most important things to remember is not to overload it. Adding too much food or liquid to the motor can cause it to wear out faster. Furthermore, it increases the load on the blades.
17. Always Follow The Instructions Manual
Lastly, always follow the instructions that came with your blender as they may recommend different settings and times for blending, so it doesn’t overheat. For example, some blenders have a safety feature that prevents them from overheating if certain types of food are blended for too long or if there isn’t enough liquid added. You can also pay attention to whether the machine is making unusual noises while blending since this could mean something got stuck on one of the blades somewhere. It’s usually best to stop what you’re doing right away and see if you can figure out what went wrong before continuing! The ingredients you put in your blender will affect its performance in many ways.
18. When do you need to replace your old blender with a new one?
It’s best to replace your blender every three or four years, and with frequent use, you might need to replace it sooner. The effectiveness of the blades will decrease gradually over time, and some people find that the noise levels increase, which can be a result of food buildup on the blades. It’s also possible that the motor isn’t as strong anymore because it runs on electricity and the voltage output may be lower. Blades are also a common cause for blenders to malfunction because they become dull or lose from wear and tear.

If you’re worried about keeping your investment lasting as long as possible, consider using your blender less frequently by using ice for smoothies instead of fresh fruit. You should also try storing any food in bags or containers before blending it, so there’s less food stuck in the blades after!
19. Close the Lid

We’ve all experienced what occurs when the blender’s lid is left off, right? There’s a lot more to it than a messed-up ceiling. Making sure the lid is not just on but on properly provides a suction that pulls your blend toward the blades.
20. Make sure you’ve entered everything correctly.
Many new blender users are unaware that there is a specific order in which food and liquids should be added to the blender. To allow the blades to move more freely, start with any liquids. After that, add the powders, so they don’t stick to the lid. After that, anything frozen or denser, such as frozen fruit, ice, or vegetables, can be added. The heaviest components should be done last since this will assist drive the rest of the contents down toward the blades.
21. Use caution when changing the speed settings.
Another crucial care strategy is, to begin with, a modest pace and gradually increase it. The engine and blades will eventually wear out if you go for high speed all the time. Plus, it will make your recipe mix even better.
22. What foods are safe in a blender and which ones should be avoided
It’s not a good idea to put anything in your blender that has a hard shell. This includes nuts, rice, beans, or even grains for cereals. You also want to avoid putting any of the following things in raw eggs, tough, stringy vegetables such as celery or broccoli, any type of fruit with rinds like oranges or pineapple, and whole chunks fruit with seeds like apples and bananas. Aside from these, you can put canned fruits or vegetables in your blender as long as you don’t overdo it and make sure they’re thoroughly blended before drinking them. This can help prevent any unwanted gas or nausea!
Trobleshooting
Blenders are available at a wide range of prices, from low-cost to high-end. When you have a mid-to high-level machine, it can be irritating when something goes wrong, and it can happen even if you take good care of it. Fortunately, many faults that many customers mistake for their appliance’s death rattle can be troubleshot and fixed.
23. Repair a Leak:
Leaks are another typical problem with blenders. The source of the leak is typically found between the base and the blender jar. The problem, on the other hand, could be caused by the blade shaft. Fortunately, the manufacturer will be able to direct you to the appropriate parts for a rapid repair. Unfortunately, if the leak is coming from the blender jar’s glass or plastic, you’ll have to replace the entire item. Attempting to repair it is not recommended because a patch is likely to make it worse, and particles from the jar could end up in your drink.
Before attempting any repairs on your blender, double-check the owner’s instructions and warranty. Furthermore, any electrical problems with the engine or cord should be handled by a pro. It’s possible that performing repairs yourself will void your warranty, so read everything carefully first.
24. Jammed Blades:
Jammed blades are one of the most common problems. When you switch on the blender, you’ll notice this issue right away. The engine will make a buzz, but the blades will not rotate. Food items that are too large become trapped between the bottom and the blade, causing the problem. Emptying the container and chopping the food into tiny pieces is the best option. You could also try increasing the speed to clear the jam. In any case, if it doesn’t work, switch it off right away to avoid motor burnout.
If your blender isn’t turning on at all, it could be due to various problems. Make sure it’s not the outlet you’re using first. Next, inspect the electrical cable of your blender to ensure it is in good working order. If this is the case, stop using the product immediately away. If you’re still having trouble, there might be a problem with the power switch.
25. Replacing a Switch:
Replacing a switch isn’t as tough as many people believe. It is also significantly less expensive than purchasing a new device. If a switch fails, contact the manufacturer to place an order for a replacement (they may point you to a service center). Replacing the switch is usually as simple as removing a few screws, popping out the old switch, and replacing it with the new one.
Conclusion
Blenders are an essential part of many kitchens and a valuable appliance to have. However, they require maintenance just like any other machine or tool you use in your home every day! There’s no need for panic when it comes to keeping your blender running smoothly with these easy tips that will help prolong its life span. If you’ve been using the same old blender for years now and want something new, then consider following our advice on how long you should wait before replacing it. From regular washes and blade checks to remember not to put anything hard into the pitcher – there are lots of small things we can do to keep up this kitchen workhorse, so make sure you’re doing them all! We hope these 25 TIPS TO MAINTAIN YOUR BLENDER help you keep your blender in tip-top shape for many years to come!


- 10 Best Dehumidifiers in 2022 (Buying Guide) - August 2, 2022
- When Should I Switch Off My Dehumidifier? - October 16, 2021
- 8 Best Commercial Dehumidifiers in 2022 (Buying Guide) - October 5, 2021